Even though I work for Jans Mountain Outfitters, I am not immune from the most common complaint of alpine skiers – painful ski boots. This is largely due to the fact that I have the trifecta of hard to fit feet – high instep, narrow heel and wide forefoot. Quite frankly, I am a boot fitters’ nightmare. So when I saddled up to the wall displaying women’s alpine ski boots at the Jans location at Deer Valley’s Snow Park Lodge, I knew this was going to be a bit of a process.
Zone Defense
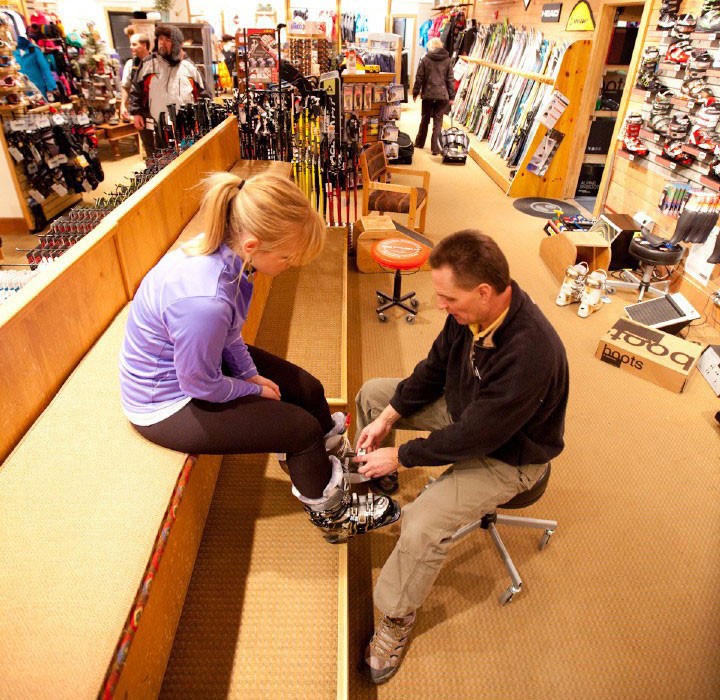
Thankfully, I was in good hands. Paul Archer, a longtime Jans’ employee, is heralded as the premier boot fitter in Park City. Which is saying a lot in a mountain town full of overachieving powder junkies. Paul explained to me that the boot-fitting process he uses takes into account three zones: Zone 1 which focuses on the instep and shin, Zone 2 which emphasizes the heel, Achilles and calf, and Zone 3 which highlights the widest portion of the foot and toes. For a successful boot fitting, Paul advises that we follow the order of Zones 1, 2 and 3. And if you’re looking for the secret to achieving the best fit, the answer lies in getting the volume “just right.”
Zone 1: Eliminate Instep and Shin Pain
For years, my high instep was my biggest nemesis in an alpine ski boot. Once buckled, the outer shell of my boot compressed over the inner liner to take out just enough volume that my instep would begin to ache. This resulted in reduced circulation to my feet which culminated in my toes going numb. My half-baked solution was to unbuckle my boots on each and every chairlift and to hit the lodge after a couple hours to take off the torture chambers and rub my feet until the feeling returned. Then I’d trudge out to slopes and repeat the process all over again.
By using the Zone method of boot fitting, Paul was able to get me to focus first and foremost on my troubled instep. At my urging we began with the Dalbello Raya since I’d done some research on the generous instep that this women’s-specific boot offered. Being the astute boot fitter that he is, Paul had me put the Atomic Medusa women’s ski boot on the other foot. While not standard operating procedure for a boot fitting, Paul knew that I would need to feel the difference between the wide Raya and the narrow Medusa to fully appreciate a proper heel fit. I immediately discounted the Medusa since my toes were hitting the front of the boot. “Not so fast,” Paul reminded me. “Toes are Zone 3 – concentrate only on Zone 1.” The Raya felt cushy and roomy with zero instep pain while the Medusa also felt good, just not as slipper-like. Hmmm. Would a ski boot that was this comfortable still give me the performance that I demanded on expert runs, both on and off piste?
Zone 2: Make Sure the Heel Doesn’t Move
As I flexed into both pairs of boots, the liners began to compact with the heat of my foot, similar to the feathers in a pillow. When Paul asked me to concentrate on Zone 2 which focused on the heel, Achilles and calf, I was shocked that I was able to completely lift my heel in the Dalbello Raya women’s ski boot. Bummer – this was definitely not the ski boot for me. On the upside, my heel remained stable in the Atomic Medusa, but the longer I wore that boot, the more my instep began to hurt and eventually my feet went numb. Back to square one.
Next we decided to try the Atomic Hawx Magna. It came in a 100mm last, which seemed like the perfect compromise between the slightly narrower Atomic Medusa and the incredibly wide Dalbello Raya. Just for kicks, I tried on the Fischer Zephyr on my other foot for comparison sake. Starting with Zone 1, I determined that both boots felt snug, yet comfortable around my instep. After a few minutes of letting the liners pack down, we moved to Zone 2 only to discover that the Zephyr was too roomy in the heel. Thankfully, the Atomic Hawx kept my narrow heel nice and stable. The only problem was that my toes were smashed against the front of the liner on the Hawx. What now?
Zone 3: Wiggle Room for Toes While Forefoot Stays Stable
I continued to flex both pairs of boots, desperately hoping for some toe relief on the Hawx, which never came. In the meantime, not only could I wiggle my toes in the Fischer Zephyr, but I could literally move my whole forefoot side to side within the boot. Not good. And there was that nasty problem of being able to lift my heel completely out of the heel pocket.
Just when I thought we were back to the drawing board, Paul pulled another boot-fitting tool out of his bag of tricks. He replaced the factory liner in both boots with an after-market liner. Much to my amazement, this solved the heel problem with the Zephyr and the toe problem with the Hawx in a single try. So now I had a fair comparison between the two.
In the end, I chose the Women’s Atomic Hawx ski boot because it delivered most consistently on all three zones: no pain across my instep, heel firmly in place and wiggle room in the toes while keeping my forefoot stable. And while I loved the fit and graphics on the Fischer Zephyr, it was just a little too roomy, even with the after-market liner.
Jans Custom Boot Fitting Process
If you’ve been putting off buying new ski boots because you’re dreading the boot-fitting process, let the experts at Jans show you how it’s done. To learn more about custom boot fitting, stop by one of our stores for your own personalized boot fit. From after-market liners to custom orthotics, Jans boot fitters have a whole cadre of resources to help you find the perfect ski boots.
If they can do it for my unique, hard to fit feet, they can certainly do it for yours.
Liz Yokubison, Editor, jans.com and whitepinetouring.com
