
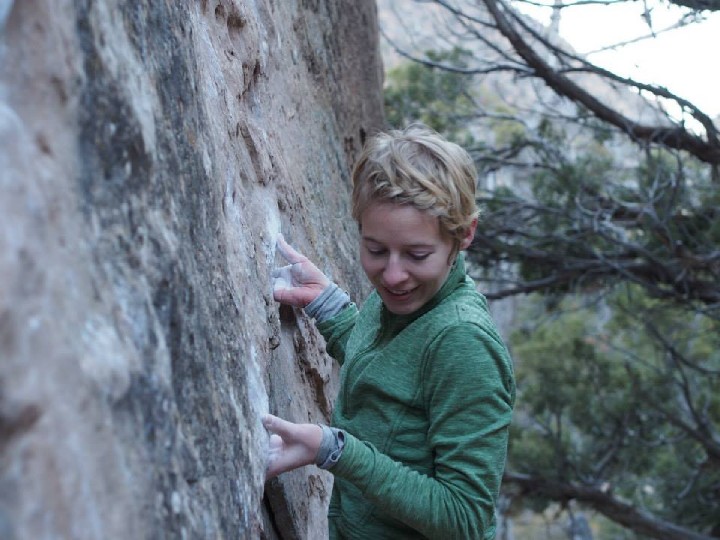
Start out easy. Do your first lead climb on a route without moves that will make you question your ability. Probably a climb you’ve done before is best. Keep it simple by choosing a single pitch climb, and something with bolted anchors so you don’t have to deal with placing traditional gear. Once you successfully lead a climb or two, you’ll get more comfortable. Then you can move on to challenge yourself to lead harder grades of climbs with other complications.
Know What Climbing Equipment You’ll Need
For the top rope set up, you’ll want a daisy chain (a length of webbing with multiple loops that carabiners can go through), to attach yourself to the anchors while you are setting up a top rope.
Bring a quickdraw (two carabiners attached by strong webbing, used to attach a rope to bolts and anchors on a rock wall) for each bolt, plus two more for the top rope set up. Maybe you have a guide book that will tell you how many quickdraws you’ll need, or maybe you can count them up. I like to have an extra quickdraw or two, just in case.
Be Prepared To Bail
Speaking of just in case – if you are unable to finish the climb, and no one that you’re with is able to finish it either (maybe because you’re tired, maybe because it starts raining hard), you can use a “bail biner” (just a carabiner with a specific intended use) to lower on. This way, if you can’t get to the chains, you only have to leave one little inexpensive carabiner on the wall rather than a more costly quickdraw. The next person who successfully completes the climb will win your bail biner to use for some other time when they have to bail.
Go With The Right Belayer & Communicate Well
You want to do your first lead climb with a belayer who is knowledgeable, patient, and mindful. Select someone who knows what they’re doing and who will kindly call you out if you’re doing something dangerous.
Before you start climbing, communicate clearly to make sure you are on the same page. Discuss what terms you will use to communicate with each other during the climb. If it’s too noisy to hear each other (due to nearby traffic or running water), set up a communication code based on tugs on the rope.
Climbing Commands & Climbing Terms
Along with the usual climbing terms used in top rope climbing, such as “on belay,” “climbing,” “take,” and “rock,” it will be important to communicate additional climbing commands. “Clipping” or “slack” will let your belayer know when to give you more rope to clip with. “Clipped” or “take” communicate to your belayer when to take up slack once you’ve clipped. You can also use the climbing term “falling” so that your belay buddy has a bit of warning in that situation. “Off belay” lets the belayer know that he/she can relax while you’re safely daisy chained up and setting up the top rope.
Clipping Bolts On Lead Belay
Practice correctly clipping a rope through a carabiner before you’re off the ground. You’ll most likely be holding onto the wall with one hand when you’re climbing, so you’ll need to do this one handed.
One carabiner of the quickdraw clips into the bolt on the wall, and the other carabiner is left hanging there for you to thread the rope through. The correct way to put the rope through is with the rope coming up from behind and out through the front, so that it ends up running straight through the carabiner from below to above.
Watch out for “backclipping” which results in an unsafe set up with an increased risk of the rope pressing the carabiner open in the event of a fall. To avoid this, reach for the rope and clip it all in one movement. Take a good, hard look after you’ve clipped it to make sure that the rope is not twisted around the carabiner at all. Your belayer should call you out if you’re backclipping. As you get used to it, clipping correctly will become more natural.
Avoid Back Stepping
“Back stepping” is when you step such that the rope is over the back of your leg. It’s easy to do and may seem like no big deal. But should you take a fall from above your protection in a backstepped position, your leg will be in the way and can cause the rope to flip you like a funny shaped pancake.
What you want to do instead is keep the rope between your body and the rock, hanging vertically from your harness down through your most recently placed protection with no legs in the way. This way, if you fall, you should just fall downward and be caught upright on your harness – not so bad.
Consider Taking A Practice Fall
Once you do a practice fall and it’s totally ok, then you’ll worry less about falling. Before you’re on belay, tell your belayer where you plan to do a practice fall (after you clip your second bolt and climb just a bit further is a good place), and then just before you fall, warn them with “falling.”
Rest If You Need To
If you’re feeling tired or unsure a few feet above your last bolt, you may want to downclimb below your last protection. Ask your belayer to “take”, and take a rest on the bolt, just like you would rest on a top rope set up. This gives your muscles a break and your mind a chance to refresh. Better to down climb and take a break than to push yourself and maybe take a hard fall.
Learn With The Experts
Learning with expert guides can be a great way to work on new climbing skills. Book a customizable guided rock climbing trip in the Uinta Mountains with the experts at White Pine Touring for a valuable and enjoyable climbing experience. A little expert guidance will go a long way to helping you feel comfortable and building your climbing skill set.
Kendall Fischer, Content Writer


