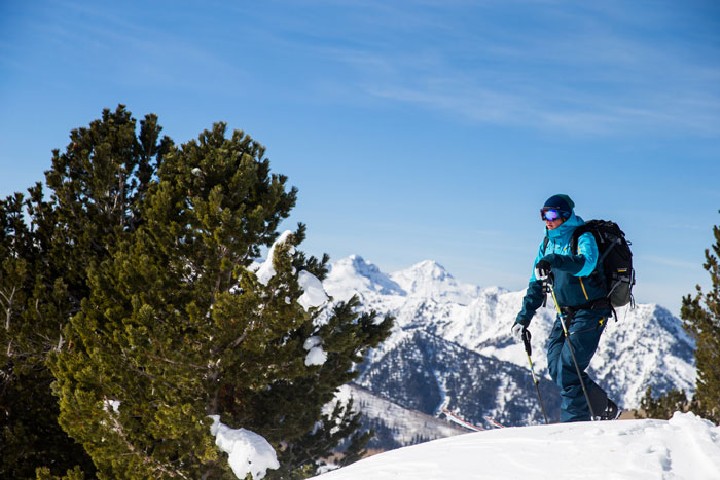
Backcountry ski touring has become increasingly popular over the past couple of years. It used to be limited to local die-hards who ate, slept, and breathed life in the mountains. Now, with increasing pollution in the Salt Lake valley, overcrowded resorts, and the overall push from society for more health and fitness, ski touring has become a lifestyle sport embraced by more people. The natural elements and length of adventure can make deciding what to bring for your day in the backcountry a nightmare – and honestly, I’ve learned this through trial by fire. So here’s a couple things that can help save you from the sweaty, freezing, and hungry occasions that could all very possibly happen in the same day!
How to Stay Safe when Touring
Before we even begin, it should be clear that nobody should ever head into the backcountry without at least taking a basic avalanche course. White Pine Touring offers free avalanche awareness seminars and AIARE Level 1-3 avalanche courses. Oftentimes there are also clinics put on by ski patrollers at your local resort. Even touring on flat terrain at the bottom of the mountains can put your life and others at risk. So get educated.
Backcountry Pack
To get organized, you’re going to need a reliable backcountry pack. It needs to have a place to store or attach a shovel, and I highly recommend that it has two body straps – one across your waist and one across your upper chest. Without both of these your pack will be slipping off your shoulders or flapping against your low back. If you want a pack that will meet your growing needs as a backcountry skier, the Ortovox Free Rider 24 ABS Backpack is a great, all-encompassing choice. It has dedicated safety gear and hydration compartments, a removable SPS spine protector, and to top it off, is ABS-compatible. The ABS (air bag system) deploys a large, pillow-like airbag from your pack when activated. This large airbag helps you stay on the snow’s surface during an avalanche and provides added protection for your head, back and neck.
AvaLung
Though air bag systems can seem a bit excessive for some minor backcountry excursions, having an AvaLung is not. The AvaLung system from Black Diamond works like a snorkel; it allows you to breathe the air readily available in the snowpack while expelling carbon dioxide away from your mouth so you don’t form an ice lens, which causes suffocation. In an avalanche situation, just a minute of extra oxygen can be the difference between life and death.
Shovel and Probe
Your pack should contain two main pieces of avalanche gear at all times: a shovel and a probe. A shovel should be durable, lightweight, collapsible, and contain a snow saw. Ortovox steps up to the plate again in avalanche gear to provide all of this with the Beast Saw Shovel. As for probes, look for ones that are sold separately from the shovel since the ones sold with a shovel are usually not long enough for realistic use. To be effective, a probe should be at least 240cm long, lightweight, and have a warranty of at least a year, such as the Black Diamond Quick draw 280cm Probe.
Beacon – Your Most Important Piece of Gear… Ever.
Your pack should not contain your beacon, because you should be wearing your beacon at all times. This sounds obvious but I’ve seen people, touring the mellow road through the gut of the mountains, wait to put their beacons on until they hit the “more dangerous” zone that they want to ski. This means they completely overlook the fact that the gulch was the most dangerous part of the tour. It’s a terrain trap. Choosing a beacon mostly boils down to your familiarity with that specific device. The Ortovox Zoom Recco Transceiver is both reliable and intuitive.
Protect your Noggin
Head injuries are the leading cause of trauma deaths in avalanches. If you get caught in a slide, you’re barreling down a mountainside with thousands of pounds of snow dragging you over rocks and into trees. Even if you don’t get caught in an avalanche, there are still hidden dangers that lurk under the surface of the snow. Wear a helmet.

How to Stay Comfortable in the Backcountry
The key to a good day in the backcountry is to stay as dry and comfortable as possible. By “comfortable” I mean keeping your body at a neutral temperature. If you’re too cold, your body will be stressed out. Too warm, and you’ll begin to overheat and sweat. To avoid this, it is important to layer properly.
Ski Socks
When it comes to socks, I’m a firm believer in the Smartwool PhD Ski Medium Socks. These have been my saviors to avoiding sweaty feet. The merino wool is warm and breathable with great wicking properties, whereas the nylon and elastane blend provides durability and stretch for the perfect fit. Skimping on quality in your ski socks is a bad choice, especially when you’ve worn through your sock’s heel and that first layer of skin is exposed.
Baselayers
When it comes to baselayers, think light and versatile. Try to wear multiple breathable layers ranging from long sleeve wool or polyester to thin down vests instead of two thick sweaters. With layers you can better regulate your body temperature to match the weather and your level of physical exertion at the time.
If it’s going to be a warm day, I’ll wear light athletic shorts (not cotton) under my ski pants. For my top, I’ll start with a short sleeve tech shirt (some sort of polyester blend) followed by a long sleeve layer like the Saga All Over Thermal Top. This top is lightweight, anti-microbial, quick-drying, and I’m not ashamed to wear it in front of my friends after I take my jacket off.
On colder days I’ll wear long thermals under my ski pants, such as the Saga Three Quarter Pant. Three-quarter pant thermals are nice since they do not interfere with your socks or the fit of your ski boot, nor do you have to roll them up and get that weird indentation on your mid-shin that cuts off circulation.
Midlayers – Your Temperature Regulator
For midlayers, you’ll want something that is lightweight, flexible, and easily fits inside your jacket. This piece of clothing should be easy to put on and take off – since you will be doing this often to control your heat output. If you are looking for a more technical piece that you could also use for trail running or camping, the Salomon Soulquest BC insulated midlayer is a great option. It features the comfortable and temperature-versatile Polartec Power Stretch fabric. For the coldest of days, I like to wear a thin puffy. These jackets are the most efficient in maintaining heat while providing flexibility. For this, the Marmot Calen Jacket gives you a great bang for your buck. If you’re one of those people who are always cold, layer up with a vest as well. A warm core equates to warm extremities.
Outerwear
Your outerwear is the last layer of the onion. A common misconception for ski outerwear is that its main purpose is to provide warmth. Outerwear serves to protect you from snow, water, and wind, whereas your base and midlayers regulate warmth. Choose outerwear to best fit the environment you live in.
If you’re in an area prone to wet conditions like the Pacific Northwest choose a GORE-TEX® jacket like the North Face Free Thinker Men’s Jacket. 3L means that there’s a fabric bonded to a waterproof and breathable membrane that’s backed with a protective scrim. Paired with fully-taped seams, this is an impenetrable force field to water – unless, of course, you rip your jacket!
In a drier climate, you have more leeway for the “fashion over function” philosophy. Pick something with a powder skirt, armpit vents, and 2L construction. The Saga Fatigue 2L Jacket is probably the most stylish, yet comfortable and high performing, jacket I have come across.
Ski pants should be looked at in a similar manner, though the waterproofing should be valued higher in your mind because they are guaranteed to have more exposure to snow than your jacket on a powder day. Choose something that fits well at your waist and allows you to reach a full stride while touring without any restriction. I’m going to take this one out of Jans’ Expert Brendan Trieb’s book and recommend the Outdoor Research Vanguard Pant. It has a loose fit that provides complete flexibility, fully-taped inner thigh zip vents, a stretch-mesh internal gaiter, and bibs to keep the champagne powder from shooting up your jacket and back into your pants. This is the hero of pants for the backcountry world.
Gloves
Alpine touring requires the intricate use of your fingers at all times. I prefer a light, breathable glove with great grip to use while ascending and removing touring gear, perhaps a Nordic skiing glove like the Toko Profi. On the way down, choose a warm, waterproof glove or mitten that will fit under the cuffs of your jacket.
Goggles vs. Sunglasses
When you’re ascending, you’re going to want to wear a pair of sunglasses. At high elevations, UV rays can be dangerous to your eyes, even if it’s not sunny. Goggles, which hold moisture and heat close to your eyes will equate to a hot, steamy mess of fog and a disappointing ski run down that you worked so hard for on the way up. Pick a pair of sunglasses that fit well and provide slight air circulation around your eyes. For goggles, bring an extra lens. In the mountains, the weather can change from bluebird skies to snow rapidly. Choose a goggle like the Smith IOS that has low light and bright light lens options and a easy, reliable mechanism to swap between.

What to Pack for Backcountry Touring
Climbing Skins
Choose a skin with a long lasting glue that does not leave residue on your skis in the cold. I’ve had the BD Ascension Nylon STS skins since I moved to Utah seven winters ago. Look for an adjustable tail clip so that you can easily switch between skis.
Fuel for the Day
If you plan on being out longer than three hours, you’ll get hungry. Pack light snacks and make sure to choose things that you can eat with your hands. Nuts, chocolate, energy chews and bars, and sandwiches are all great options.
Hydration
You’re supposed to drink at least eight cups of water a day without activity. When you’re exerting yourself at elevation you need to double this amount. This is especially true for those of us on the larger size end of the spectrum (I’m 6’1″ and 180 lbs.) For longer tours I carry a 32 ounce bottle of Gatorade to keep the electrolytes flowing and a 16 ounce bottle of water. When you’re done after a long day in the backcountry, you’re likely to be cold and fatigued. So keep a thermos of hot tea or coffee in your car for the ride home. Days that I remember to do this are days that I’m a lot happier.
Extras
Most of these were discovered from my own failures or stories heard along the way. I’ll try to save you from these troubles by suggesting you pack the following:
- Toilet paper
- Lighter
- Twine
- Duct tape
- Extra face tube/gaiter
- Headlamp
Enjoying a day of ski touring in the backcountry is all about the preparation. Make sure you’re educated about avalanches, have packed the right gear and supplies and are dressed properly. Then sit back and enjoy the ride.
Giray Dadali, Jans Athlete Team Member